The Dinner Whisk
  • Home
  • Services
  • Client Testimonials
  • Gallery
  • Contact
  • About
  • Blog
  • Reheating Instructions

MAKE THIS!
Recipes To Savor Your Time

Holiday Desserts: Drab-to-Fab Chocolate Cake

11/7/2022

0 Comments

 
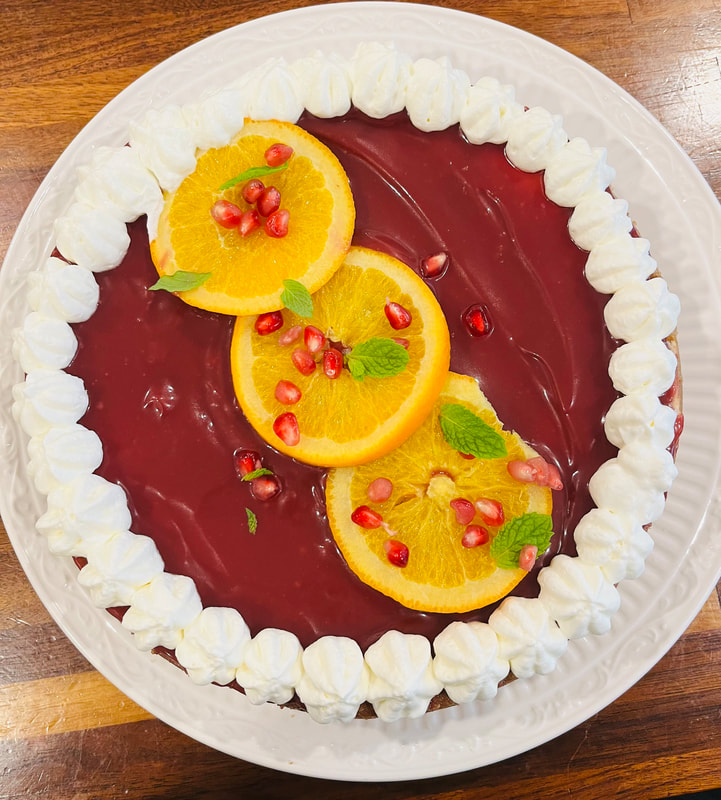
There are infinite ways to glam up a chocolate cake.  Let your creativity flow - fruit, peppermint, chocolate chip mint, candy bar, hazelnut, almond, cherry, orange...I can keep going.  It's always good to have a "go to sauce" for your desserts.  Here is my Raspberry Coulis recipe.  Coulis is fancy french term for a pureed and strained fruit sauce.  Fill your squeeze bottle with this sauce and make a pretty plate.

Tina's Raspberry Coulis
* 16 oz. bag frozen raspberries (about 2 cups)
*  1/2 cup granulated sugar
*  1/2 cup water
*  1 TBS Chambord Raspberry liquor

Place all of the ingredients into a saucepan.  Stir to combine.  Bring the mixture to a boil.  Mash up the berries as the mixture boils.  Once all of the berries are broken up, turn off the heat and let the mixture cool.  Once cool, blend the sauce up until it's smooth.  Strain through a fine mess sieve.  Raspberries have tiny seeds that will not get blended up so they must be strained or else they'll block your squeeze bottle.  

Yield: 1 cup
0 Comments

Holiday Desserts: Drab-to-Fab Cheesecake

11/7/2022

0 Comments

 
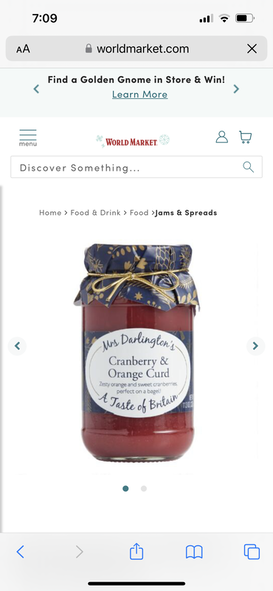
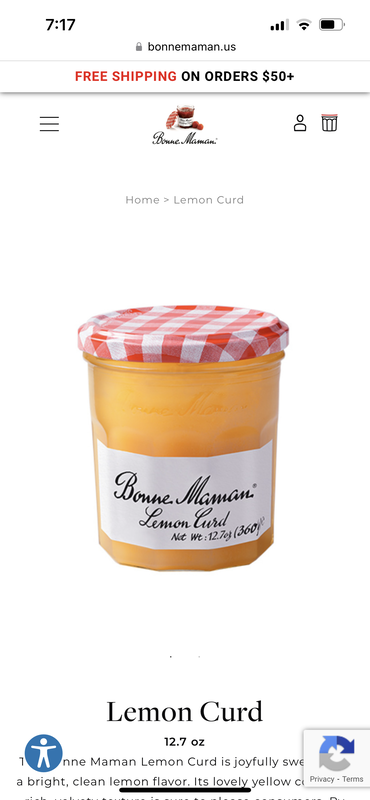
A great way to jazz up your cheesecake is by topping it with a curd, which is a pastry cream made from fruit juice.  It brings a super concentrated flavor to that creamy cheesecake.  If you'd like to make homemade curd, Sally's Baking Addiction has a great recipe.  

Alternatively, store bought curd from reputable brands such as Bonne Maman or Mrs. Darlington's will do the trick and no one will be the wiser:)  

Lemon Curd
https://sallysbakingaddiction.com/how-to-make-lemon-curd/

Ingredients
  • 4 large egg yolks (see note)
  • 2/3 cup (134g) granulated sugar
  • 1 Tablespoon lemon zest (about 1 lemon)
  • 1/3 cup (80ml) fresh lemon juice (about 2–3 lemons)
  • 1/8 teaspoon salt
  • 6 Tablespoons (86g) unsalted butter, softened to room temperature
Instructions
  1. Fill the bottom pot of your double boiler with 1-2 inches of water. (Or use the DIY double boiler method listed in the notes.) Place on high heat. Once the water begins to boil, reduce to low heat to keep the water at a simmer.
  2. Place egg yolks, granulated sugar, lemon zest, lemon juice, and salt into the top pot of your double boiler. Using a silicone whisk, whisk until completely blended, then continue to whisk as the curd cooks. Constant whisking prevents the egg yolks from curdling. Whisk and cook until the mixture becomes thick, resembling the texture of hollandaise sauce, about 10 minutes. If curd isn’t thickening, turn up the heat and constantly whisk.
  3. Remove pan from heat. Cut the butter into 6 separate pieces, then whisk into the curd. The butter will melt from the heat of the curd. Pour curd into a jar or bowl and place a piece of plastic wrap directly on top so it is touching the top of the curd. (This prevents a skin from forming on top.) The curd will continue to thicken as it cools. Once cool, the plastic wrap can be removed.
  4. Refrigerate the curd for up to about 10 days.
Picture
Picture
Picture
0 Comments

Holiday Desserts: Drab-to-Fab Pudding Parfait

11/7/2022

0 Comments

 
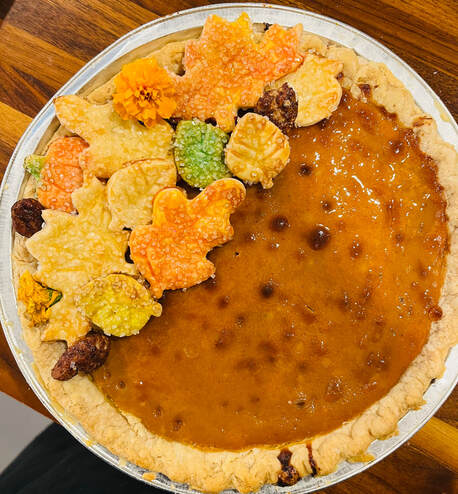
After a big and rich holiday dinner, it's nice to have something that is light and sweet.  The answer is this delicious homemade chocolate pudding.  Do it all ahead and then glitz it up for  your guests. 

Smitten Kitchen's Best Chocolate Pudding
https://smittenkitchen.com/2008/02/best-chocolate-pudding/

Serves 6 to 7
1/4 cup (30 grams) cornstarch
1/2 cup (100 grams) sugar
1/8 teaspoon salt
3 cups (710 ml) whole milk
6 ounces (170 grams) semi- or bittersweet chocolate, coarsely chopped (or 1 cup good chocolate chips)
1 teaspoon (5 ml) pure vanilla extract
Combine the cornstarch, sugar and salt in a medium saucepan, Slowly whisk in the milk, in a thin steam at first so that lumps don’t form, then more quickly once the cornstarch mixture is smoothly incorporated. Place over medium-low heat and stir occasionally, scraping the bottom and sides. Use a whisk as necessary should lumps begin to form. After 10 minutes or so (slower over lower heat is better, to give the cornstarch time to cook), before it starts to simmer, the mixture should begin to thicken, enough that it will coat the back of a spoon. Add the chocolate, and continue stirring for another 2 to 4 minutes, until chocolate is fully incorporated and mixture is quite thick. Remove from heat and stir in the vanilla.
If you’re concerned about lumps: Run mixture through a fine-mesh strainer.
Distribute among individual pudding cups or one large serving bowl, and chill until it is cool and set, about 2 to 3 hours.
If you dislike pudding skin: Put plastic on top of the pudding and smooth it gently against the surface before refrigerating.
Do ahead: Pudding is good for 3 days in the fridge but nobody I know would allow it to last that long.
Picture
0 Comments

Holiday Desserts: Drab-to-Fab Pumpkin Pie

11/7/2022

0 Comments

 
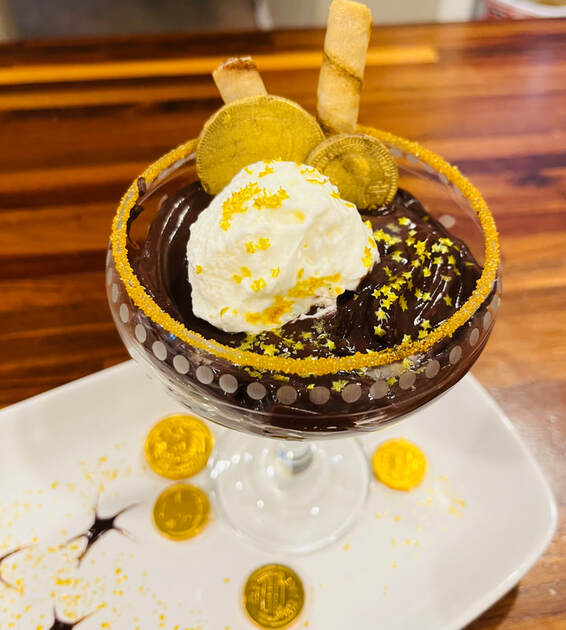
While pumpkin pie is a Thanksgiving staple and totally delicious, its not the most beautiful dessert - tan, burnt orange.  To give your pie some style, prepare some pie crust cookies to adorn the pie.  Here's how:

Pie Crust Cookies
* 1-2 pie crusts, store bought
*  White sparkling sugar
*  1 egg 
*  Gel food coloring
*  Leaf & pumpkin cookie cutters

Preheat the oven to 350 degrees.  Remove the pie crusts from the package and let them come to room temperature.  While the crusts rest, prepare a simple egg wash of 1 egg and a splash of water.  Whisk very well to ensure the egg wash is a homogeneous mixture.  Divide the egg wash into small bowls.  Using a toothpick, add gel food coloring to each bowl - red, yellow, orange, green.   Cut the pie crusts out with your cookie cutters.  Using a pastry brush, add the egg wash to the cutouts.  Top each cookie with white sparkling sugar to get them a bit more sparkle.  Bake for 10-12 min.  Cookies should have some golden color.  Let cool and arrange on the pie.
Picture
Picture
0 Comments

Not Your Average Potluck Summer Salad

7/2/2020

0 Comments


Picture


​
​


​


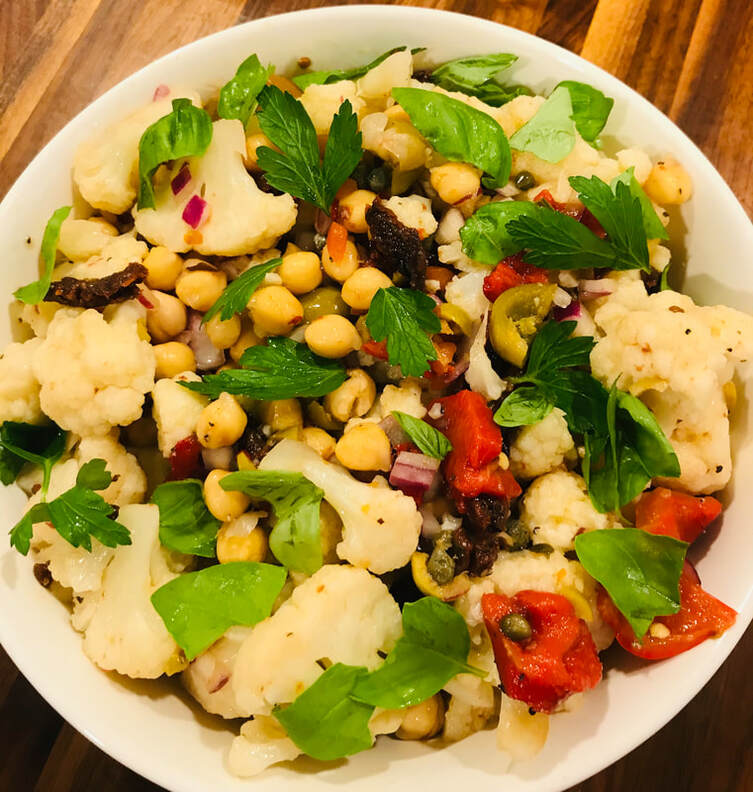
​As we get ready for the July 4th holiday, I hope you all are planning to celebrate in a safe way.  Swimming, water balloons with a couple of sparklers and lots of delicious potluck foods are the way to go.  I recently found a delicious and healthy salad that is not your “run of the mill” summer salad.  It’s low carb, vegetable centric, great for the hot weather and will taste better the longer it stays in the fridge. 

​Sicilian Cauliflower Salad
https://www.fromachefskitchen.com/sicilian-cauliflower-salad/
 
Here are my notes:
  • Make sure you cut up the cauliflower into bite size pieces.  If you think a piece might be too big, trim it up a bit.  When I made this salad, my pieces were a bit too chubby.
  • Reduce the olive oil and red wine vinegar by 50%.  The roasted red peppers, olives and capers have been soaked in brine, so they bring a lot of flavor to the dish.  You need less dressing than called for here.  (You can always add more dressing if need be). 
  • When you blanche the cauliflower and then put it in an ice bath, salt the ice bath or else you will just wash away the salt from your blanching liquid.
  • I love chickpeas so next time I will add an extra can. 
  • I also added sweet cherry peppers because I am obsessed with them.  They were a delicious addition.
  • Finally, I had some fresh basil in my garden box so I topped the salad with that as well. 
Enjoy your July 4th holiday!  Be patriotic - save a life of a fellow American - social distance, wear a mask and don't drink & drive! 
0 Comments

Bits & Pieces No Bake Cheesecake - A Creative Process

5/25/2020

1 Comment

 
Picture
Today is Memorial Day.  I’d like to give a heartfelt remembrance to all of the brave souls who have lost their life serving our country. 

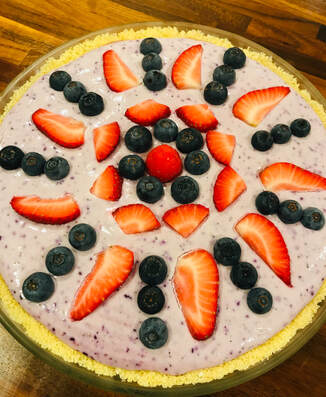
Sadly, we also must recognize the 97K + loved ones lost to Covid-19.  It’s hard to wrap your head around that number.  I pray for those souls and their families who are no doubt suffering from such an immense loss. 

Finally, I’d also like to honor the strength and courage of those on the frontline during this crisis.  They have kept our country going, saved lives and continue to put themselves in harm’s way.  Thank you! 


I whipped this dessert up to honor the day.  I call this “Bits & Pieces No Bake Cheesecake”.  The reference to “Bits & Pieces” means I’ve used up the small quantities of ingredients I had in my fridge, freezer and pantry.  This is more of a process than a recipe and you can easily replicate this and take it in a whole different flavor direction.

The Crust
  • Make a crust just like you’d make a graham cracker crust – crumbs + melted butter.  I used over-baked signature Tinsel & Sugar Lemon cookies that were tucked away in my freezer.  Today they became a delicious lemon crust for this dessert.  It was about 2 cups of crumbs (half gallon bag of cookies) and 3 Tablespoons of melted unsalted butter.
  • Buzz up the cookies in the food processor to a small crumb, add melted butter and give it a couple of pulses until the mixture resembles damp sand.
  • Press into an even layer in your pie dish.  Put it in the refrigerator while you make the filling.  

The Filling
  • I had a handful of frozen blueberries, a small handful of sad fresh blueberries, and some beautifully ripe strawberries.  All got buzzed up in the food processor and then strained to remove the seeds and pulp.  Set aside.
  • To complete the filling, I had one brick of reduced fat cream cheese, ½ brick regular cream cheese and ½ cup of mascarpone cheese.  All of the cheeses got buzzed up in the food processor along with a 14 oz can of sweetened condensed milk, juice of one small lemon and a tablespoon of vanilla.  After a couple of pulses, I added in the fruit puree and gave it a couple more pulses until smooth. 
  • Pour the filling into the pie crust, smooth out the top with a spatula and then decorate as you wish.  Pop it in the refrigerator to let it set, preferably overnight.

The Result
  • My cheesecake only set up for about 6 hours, so it would have been firmer if I’d let it go longer.
  • My recommendation is to use 2 bricks of regular cream cheese as I believe it would give the cheesecake a firmer texture.  Having said that, we enjoyed the cake and I got the satisfaction of using up what I had on hand vs. heading to the grocery store.

​Happy Memorial Day!


1 Comment

Comfort Coffee Cake from the Baking Dispatcher

5/8/2020

0 Comments

 
Picture

Picture
You caught me - I ate some cake before snapping the pic:)
Picture

My daughter has become my "Baking Dispatcher"!  During this Covid time, she likes to say "Hey, can we make some chocolate chip cookies?"  Let's break this down ...1) there is no WE in this, this is her way of saying...Mom, rassle up some chocolate chip cookies and 2) she usually asks for these sweet treats at 8:30 PM at night when I've put in a full day of cooking already. Case in point, this past week, at the dinner table, she says "Hey Mom, can you make me some Naan bread?"  Sigh....I am not a Naan whisperer at all but I continue to persevere.  Kiddo has been struggling lately with the "new normal" so I started the oven with my pizza stone and got to work.  We were all enjoying Show Me The Curry's Naan bread warm at 9 PM with some room temperature butter 
​Show Me The Curry Naan Recipe
​Not a bad way to end the evening! 
I guess, since that went so well, my daughter levied her baking desires again at 9 PM on Wednesday...."Hey Mom, can you make me some coffee cake? or an Apple Clafoutis?" I respond..."Are you kidding me, it's 9 PM!  I'm getting ready for my slumber!"  The next day I set out to make my kid happy and hey, coffee cake does sound really good!  I reach out to my good friend and colleague,
​Anne Blankenship @ Designed Cuisine 
​
for a tried and true coffee cake recipe.  She gave me the perfect coffee cake recipe - easy to make, completely traditional and you can just taste the homemade difference!  Fortunately, Anne nabbed this recipe from the Dallas Morning News Taste section back in 2007. 
It's a winner! Check it out!

​Coffee Cake Exceptionale
2 1/4 cups All Purpose Flour
1/2 TSP Salt
2 TSP Cinnamon, divided
1/4 TSP Ginger, ground
1 Cup Brown Sugar, firmly packed
3/4 Cup Sugar, granulated
3/4 Cup Canola or Vegetable Oil
1 Cup Walnuts or Pecans, chopped
1 TSP Baking Soda
1 TSP Baking Powder
1 Egg, Large, beaten
1 Cup Buttermilk

How To
Preheat the oven to 350.  Grease a 9x13 baking pan.  (I used a Pyrex)

In a large bowl, mix flour, salt, 1 tsp cinnamon, ginger, both sugars and oil.  

Remove 3/4 cup of the sugar mixture and add it to the nuts & remaining teaspoon of cinnamon.  Mix well & set aside to use as the topping.  (I used walnuts).

In separate bowl, combine buttermilk, egg, baking soda & baking powder.  Add wet ingredients to the dry ingredients.  Mix until combined. Small lumps in batter are OK.  

Pour batter into the prepared pan.  Sprinkle topping mixture evenly over the surface & bake for 40-45 mins.  (My cake took 40 min, it's ready when the toothpick/skewer comes out clean).  

Yield: 12- 16 servings

No Buttermilk, No Problem: Add 1 tablespoon of white vinegar or lemon juice to 1 cup milk.  Let sit for 10 minutes and give it a stir.  You'll note that the milk has thickened from the acid and will look like buttermilk.  When I made this recipe, I didn't have buttermilk and used this workaround.  I use it all of the time - works like a charm!


0 Comments

Sweet Potato & Black Bean Burgers

4/30/2020

0 Comments

 
Picture
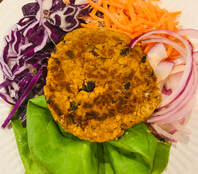
With the Covid-19 pandemic underway, we all want to limit our trips to the grocery store and make good use of our pantry.  These burgers are delicious, easy to make and super cheap! Not to mention, they are meatless so you can do something good for yourself, the planet, the animals and your wallet :)  Serve them on sandwich thins, burger buns or lettuce leaves with some Sriracha mayo or even some BBQ sauce.  Enjoy!

Ingredients
1 can Black beans, drained & rinsed (~1.25 cup yield)
2 large Sweet potatoes, cooked, peeled &  mashed (~2 cups yield)
1/2 cup Onion, fine dice 
2 Garlic cloves, minced 

1/4 cup Bean liquid 
1/3 cup Oats, quick cooking         
2 TSP Smoked Paprika               
1 TSP Cumin, ground                  
Salt & Pepper                   
2 TBS Oil for pan frying
               ​

How To

Cook & mash sweet potatoes. Roast in the oven @ 350 degrees for about 1 hour
OR poke some holes in sweet potato and microwave for 5-7 min.  Cook until tender and a knife pokes through very easily.  Let cool and peel.  SAVE THE SKINS.  Mash up potatoes.

Drain & rinse the black beans.  SAVE THE LIQUID.  Season with salt & pepper.

Sauté aromatics.  Heat skillet over medium heat with olive oil.  Sauté onions, garlic and spices. Once onions are soft, deglaze the pan with 2 TBS of the bean liquid.

Combine ingredients.  Add sweet potatoes, black beans, onions/garlic/spice mixture, and oats into a bowl and mix to combine. Add 2 TBS bean liquid.  NOTE: If the mixture feels too wet, add up to another 1/3 cup of quick oats.  The oats act like breadcrumbs and will absorb excess moisture and will disappear into the burgers.

Measure burgers using 1/3 measuring cup.  Form with hands.  Place on parchment lined sheet pan.  Refrigerate for 30 min.

​​Preheat oven to 400 degrees

Pan fry burgers.  Heat up nonstick skillet on medium high, add vegetable or olive oil and
pan sear burgers so they get a golden-brown crust.  Place burger on sheet pan and bake for 10 min. 

Bonus: Use the sweet potato jackets to make potato skins.  Cut up into chip size pieces, lightly coat with olive oil and spices.  Bake skins @400 degrees for about 10 min until they are crispy.  Don't go far because they can burn fast!


0 Comments

    Author

    Chef Tina is a passionate Chef and Foodie who is living her lifelong dream!

    Archives

    November 2022
    July 2020
    May 2020
    April 2020

    Categories

    All
    Burgers
    Coffee Cake
    Comfort Food
    Covid Baking
    Food
    Indian Food
    Ingredients
    Naan
    Pantry
    Personal Chef
    Plant-based
    Recipes
    Vegan
    Vegetarian

    RSS Feed

Proudly powered by Weebly
  • Home
  • Services
  • Client Testimonials
  • Gallery
  • Contact
  • About
  • Blog
  • Reheating Instructions